
Run Multi-Container Applications With Docker Compose
Docker Compose to run a web application with Flask and Postgres containers.


Docker revolutionized how we run applications by packing the application with the platform dependencies as containers.
If you are new to Docker, then read this to learn about Docker.
While Docker is great for individual containers, real-world applications often require multiple containers working together, such as a web server, a database, and an application server.
Docker Compose simplifies this process by allowing us to define and manage multiple containers as a single unit.
If you are new to Docker, read this article to familiarise yourself with Docker before starting with Docker Compose.
What this blog post is all about?
In this blog post, we’ll learn to use Docker Compose by building a practical example of a web application with multiple, interconnected containers.
This application will demonstrate how to create data from a front-end form, store it in a database, and display it on the web page. By the end of this blog post, you’ll have a solid understanding of how to use Docker Compose to orchestrate complex container-based applications.
What is Docker Compose?
Docker Compose is a tool for defining and running multi-container applications.
Docker Compose lets you define and run multi-container Docker applications using a single file, docker-compose.yml and run the application involving multiple services with just one commanddocker-compose up.
Why Docker Compose?
You define application services and their corresponding build options such as networks, volumes, and environment variables in
docker-compose.yml.All Docker services share the same network and can talk to each other internally. Think of services as part of an application such as front-end services, API services, DB services, etc.
we can build and run all of our services with a single command
docker-compose up.Since the whole application comprises one config file, we can easily share the application and anyone can use that to run the application. It can easily be stored in version control systems like Github and is easy to set up a CICD pipeline for the application.

Running multi-container Docker applications Docker Compose?
In this example, we will run a multi-container web application using Flask and Postgres.
The first container will be running a Postgres database
The second container will run the Flask-based web application to talk to the database container.
Note: You can find the code used in this blog in my Public Github Repo.
This is the tree structure of our application.
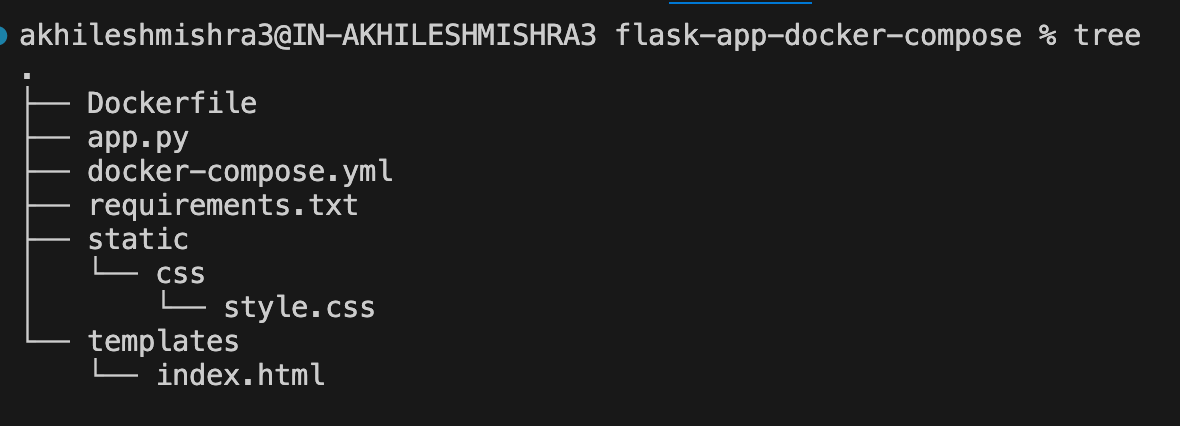
Paste the below commands in your terminal(Linux, Mac) to create the above folder structure, or create this file structure using VScode, or any other editor.
mkdir docker-compose
cd docker-compose

# create files/directory to store the code
touch docker-compose.yml requirements.txt app.py Dockerfile
mkdir -p static/css
touch static/css/style.css
mkdir templates
touch templates/index.htmlDockerfile— This will be used to build the web application image.app.py— This will contain the Flask code for the web application we will build in this blog.requirements.txt— This will contain the application dependencies.docker-compose.yml— This is the docker-compose config file.templates/index.html— This will contain the HTML code for our Flask application.static/css/style.css— This will contain the CSS style code.
Writing code for this example.
Dockerfile
# Dockerfile
FROM python:3.8

# Set the working directory in the container
WORKDIR /app

# Copy the requirements file into the container at /app
COPY requirements.txt .

# Install dependencies
RUN pip install -r requirements.txt

# Copy the rest of the application code into the container at /app
COPY . .

# Command to run the application
CMD [”python”, “app.py”]
docker-compose.yml
Here we have defined two services, app, and db, both sharing the same network.
We have exposed app container port 5000 to host post 5000. Similarly, we have exposed the db container port 5432 to host port 5432.
App container depends on the availability of the DB container.
We have used a health check on the db container to ensure that DB is ready to take connect requests from the app container
We have used the named volume for the DB container.
We have used environment variables to store Postgres db creds and db names.
Normally we shouldn’t hardcode the credentials in the config file, there are many options to securely share the sensitive values that we will discuss later in the post.
docker-compose.yml
version: ‘3.8’

# Define the services for the multi-container application
services:
  # Configuration for the app service
  app:
    # Build the container using the Dockerfile stored locally in the current directory
    build: .
    # Map port 5000 of the host to port 5000 of the container
    ports:
      - “5000:5000”
    # Attach the service to the user-defined network named cool_network
    networks:
      - cool_network
    # Define dependency on the db service, waiting for it to be healthy before starting
    depends_on:
      db:
        condition: service_healthy
    # Establish a link with the db service for legacy compatibility (optional)
    links:
        - db

  # Configuration for the db service
  db:
    # Use the latest postgres image from Docker Hub
    image: postgres:latest
    # Environment variables for PostgreSQL configuration
    environment:
      POSTGRES_USER: postgres
      POSTGRES_PASSWORD: password
      POSTGRES_DB: mydatabase
    # Map port 5432 of the host to port 5432 of the container
    ports:
      - “5432:5432”
    # Ensure the service restarts always
    restart: always
    # Mount a volume named postgres_data_new for persisting PostgreSQL data
    volumes:
      - postgres_data_new:/var/lib/postgresql/data
    # Attach the service to the user-defined network named cool_network
    networks:
      - cool_network
    # Configure health check to ensure service readiness
    healthcheck:
      test: [”CMD-SHELL”, “pg_isready -U $${POSTGRES_USER} -d $${POSTGRES_DB} -t 1”]
      interval: 10s
      timeout: 10s
      retries: 10
      start_period: 10s

# Define named volumes
volumes:
  postgres_data_new:

# Define user-defined networks
networks:
  cool_network:
app.py, requirements.txt, index.html, style.css
app.py
# Import necessary modules from Flask framework
from flask import Flask, render_template, request, redirect, url_for
from flask_sqlalchemy import SQLAlchemy

# Initialize Flask application
app = Flask(__name__)

# Configure SQLAlchemy settings to connect to PostgreSQL database
app.config[’SQLALCHEMY_DATABASE_URI’] = ‘postgresql://postgres:password@db:5432/mydatabase’

# Initialize SQLAlchemy instance with the Flask application
db = SQLAlchemy(app)

# Define a SQLAlchemy model representing the ‘Data’ table in the database
class Data(db.Model):
    # Define columns for the ‘Data’ table
    id = db.Column(db.Integer, primary_key=True)  # Primary key column
    name = db.Column(db.String(80))                # Name column of maximum length 80 characters

    # Representation method for the Data model
    def __repr__(self):
        return ‘<User %r>’ % self.username

# Function to create the database table based on the defined models
def create_table():
    # Use app context to access the application context for database operations
    with app.app_context():
        # Create all database tables defined in the application
        db.create_all()

# Define a route for the root URL (’/’) of the web application
@app.route(’/’, methods=[’GET’, ‘POST’])
def index():
    # Check if the request method is POST (form submission)
    if request.method == ‘POST’:
        # Extract ‘name’ from the form submission
        name = request.form[’name’]
        # Create a new Data object with the extracted ‘name’
        new_data = Data(name=name)
        # Add the new Data object to the session
        db.session.add(new_data)
        # Commit the session to persist the changes to the database
        db.session.commit()
        # Redirect the user to the index route (refreshes the page)
        return redirect(url_for(’index’))
    else:
        # If the request method is GET, query all data from the ‘Data’ table
        data = Data.query.all()
        # Render the index.html template with the queried data
        return render_template(’index.html’, data=data)

# Entry point to the application
if __name__ == ‘__main__’:
    # Call create_table function to ensure database table exists
    create_table()
    # Run the Flask application on host ‘0.0.0.0’ and enable debug mode
    app.run(host=’0.0.0.0’, debug=True)
index.html
<!DOCTYPE html>
<html lang=”en”>
<head>
    <meta charset=”UTF-8”>
    <meta name=”viewport” content=”width=device-width, initial-scale=1.0”>
    <link rel=”stylesheet” href=”{{ url_for(’static’, filename=’css/style.css’) }}”>
    <title>Flask PostgreSQL Docker App</title>
</head>
<body>
    <h1>Add Data</h1>
    <form method=”POST”>
        <input type=”text” name=”name” placeholder=”Enter name”>
        <button type=”submit”>Add</button>
    </form>
    <h2>Data in Database</h2>
    <ul>
        {% for item in data %}
        <li>{{ item.name }}</li>
        {% endfor %}
    </ul>
</body>
</html>
style.css
body {
    font-family: Arial, sans-serif;
    background-color: #f2f2f2;
    margin: 0;
    padding: 0;
}
h1 {
    color: #333;
    text-align: center;
    margin-top: 20px;
}
form {
    text-align: center;
    margin-top: 20px;
}
input[type=”text”] {
    width: 300px;
    padding: 10px;
    border: 1px solid #ccc;
    border-radius: 5px;
    font-size: 16px;
    margin-right: 10px;
}
button[type=”submit”] {
    padding: 10px 20px;
    background-color: #4CAF50;
    color: white;
    border: none;
    border-radius: 5px;
    cursor: pointer;
    font-size: 16px;
}
button[type=”submit”]:hover {
    background-color: #45a049;
}
h2 {
    color: #333;
    text-align: center;
    margin-top: 20px;
}
ul {
    list-style-type: none;
    padding: 0;
    margin: 0;
    text-align: center;
}
li {
    background-color: #fff;
    padding: 10px 20px;
    border-bottom: 1px solid #ccc;
    transition: background-color 0.3s;
}
li:hover {
    background-color: #f9f9f9;
}
requirements.txt
Flask
Flask-SQLAlchemy
psycopg2-binary
Flask app initializes with SQLAlchemy for database connection.
Database URI set for PostgreSQL connection.
The data model is defined with
idandnamecolumns.Routes are defined for root URL handling both GET and POST requests, storing and rendering data.
There is some HTML and CSS that our application will use.
If you don’t hate to write docker-compose files, use the docker init command to do it for you.
Read this blog to learn how to auto-generate the Docker and docker-compose config files with docker init command.
Run the multi-container application with Docker Compose.
You can copy the code in the file/folder structure I explained above.
If you are lazy like me, clone the code from the Public Github Repo.
git clone https://github.com/akhileshmishrabiz/Devops-zero-to-hero

cd Devops-zero-to-hero/AWS-Projects/multi-container-app-docker-compose

docker-compose up --build
IMPORTANT:
If you are following along with this blog post, make sure you have docker-compose installed on your local machine. The easiest way of doing this is by installing the Docker Desktop application, which installs all dependencies for Docker and Docker Compose.
If you are running it on a cloud Linux VM, such as Amazon EC2 running an amazon-linux2 OS, use the below steps to install the Docker and Docker-Compose.
Install Docker
# Install docker
sudo yum update -y
sudo yum install docker -y
sudo systemctl enable docker
sudo systemctl start docker
sudo usermod -a -G docker ec2-user
#-> make sure to logout and login again to run docker command without sudo <-#
Install Docker Compose
# Install docker compose on amazon linux
sudo curl -L https://github.com/docker/compose/releases/latest/download/docker-compose-$(uname -s)-$(uname -m) -o /usr/local/bin/docker-compose
sudo chmod +x /usr/local/bin/docker-compose
# Check if it is installed
docker-compose version
Now that your code and installation are sorted, run the multi-container application with just one command.
docker-compose up --build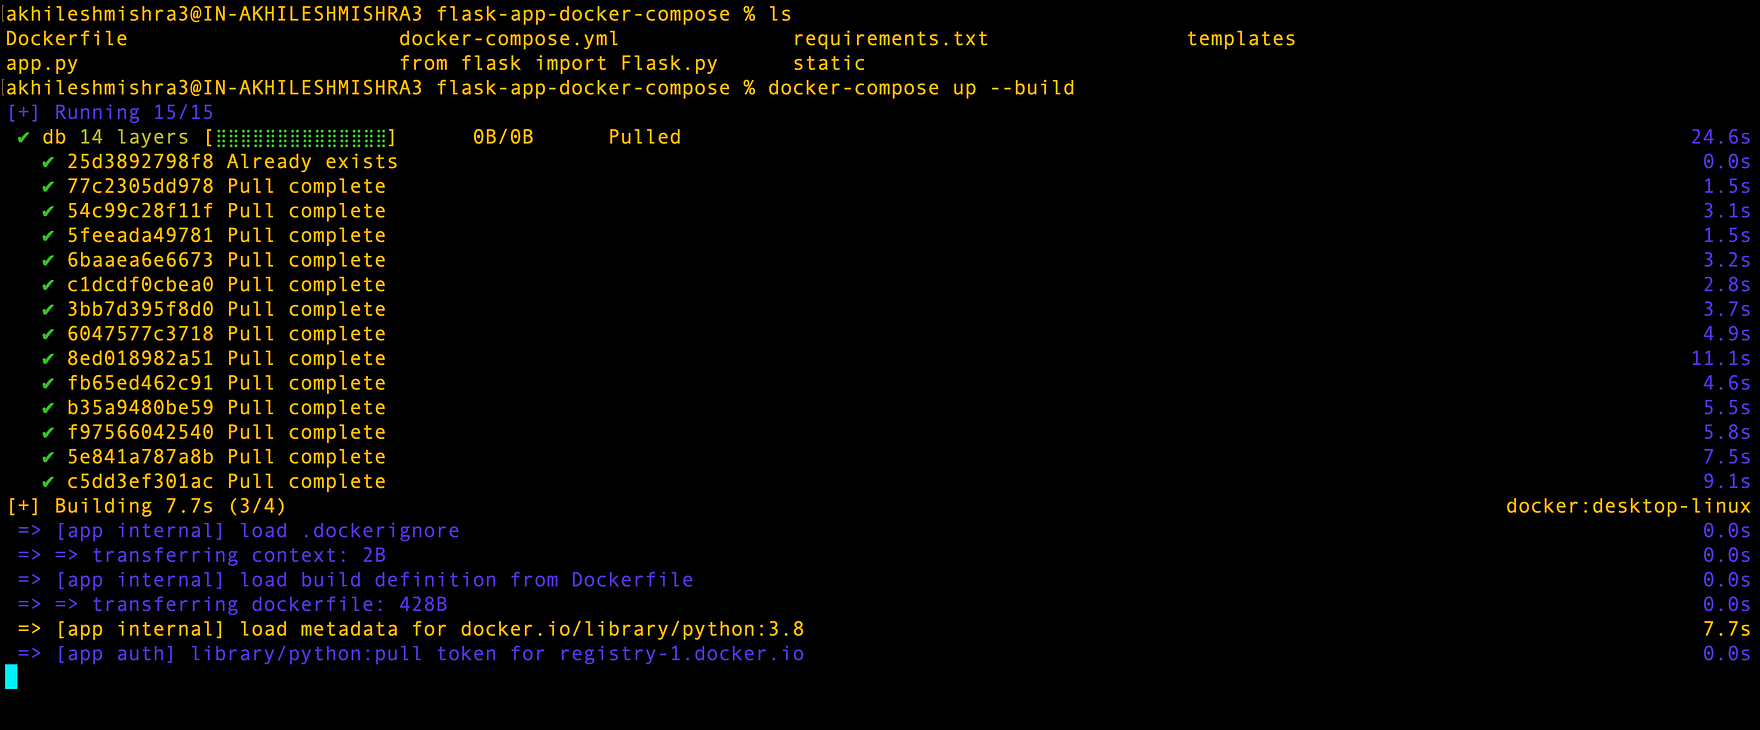
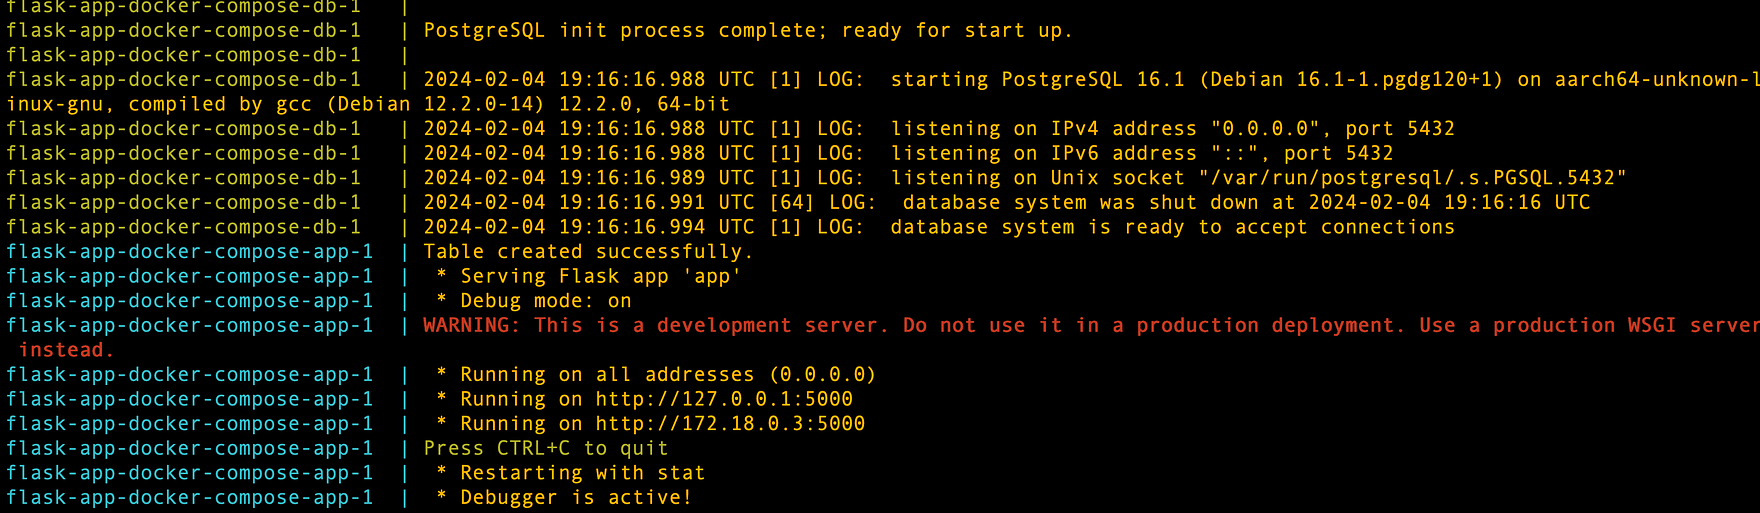
docker ps
CONTAINER ID IMAGE COMMAND CREATED STATUS PORTS NAMES
7c99c9539298 flask-app-docker-compose-app “python app.py” About a minute ago Up About a minute 0.0.0.0:5000->5000/tcp flask-app-docker-compose-app-1
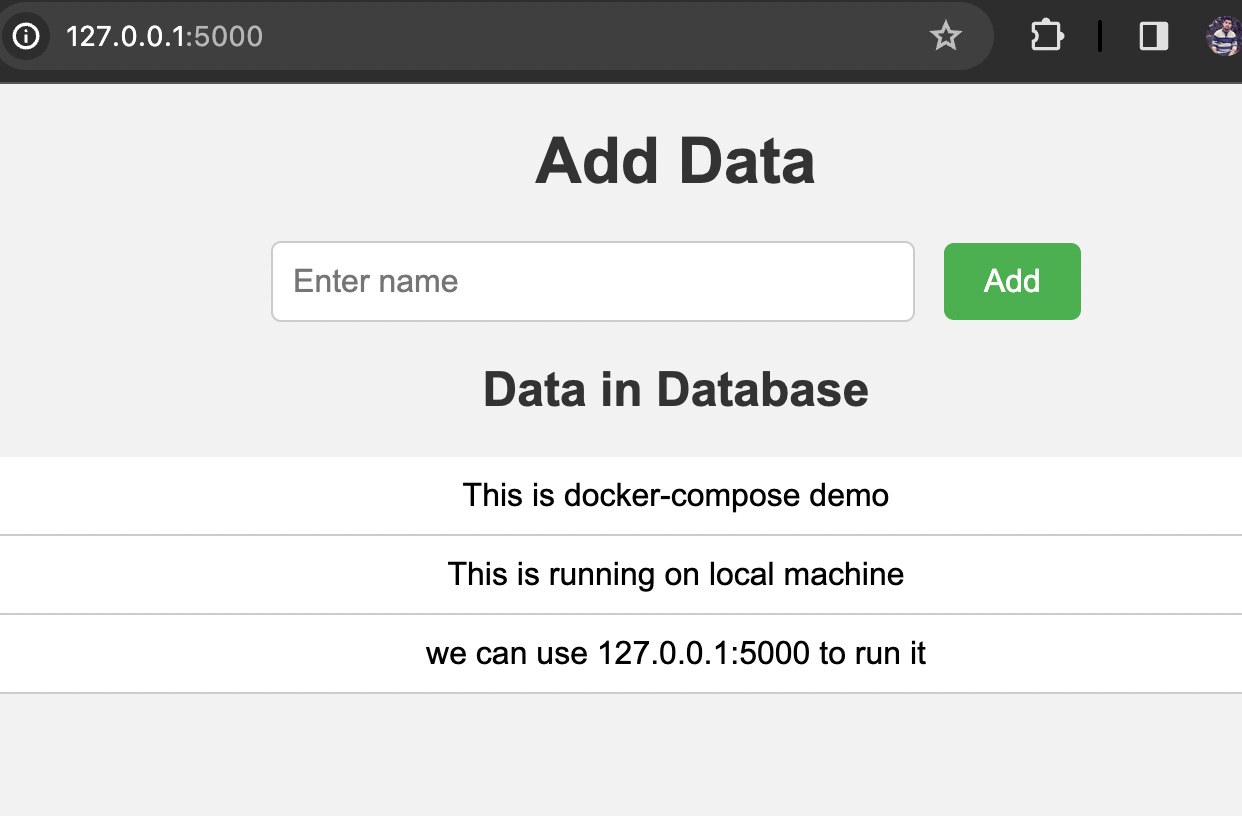
78f6a230ca24 postgres:latest “docker-entrypoint.s…” About a minute ago Up About a minute (healthy) 0.0.0.0:5432->5432/tcp flask-app-docker-compose-db-1Since we are running this application on the local machine, we can use localhost(127.0.0.1) to access the application on port 5000. If you are running this on an EC2 machine with a public IP, use that IP to access the application.
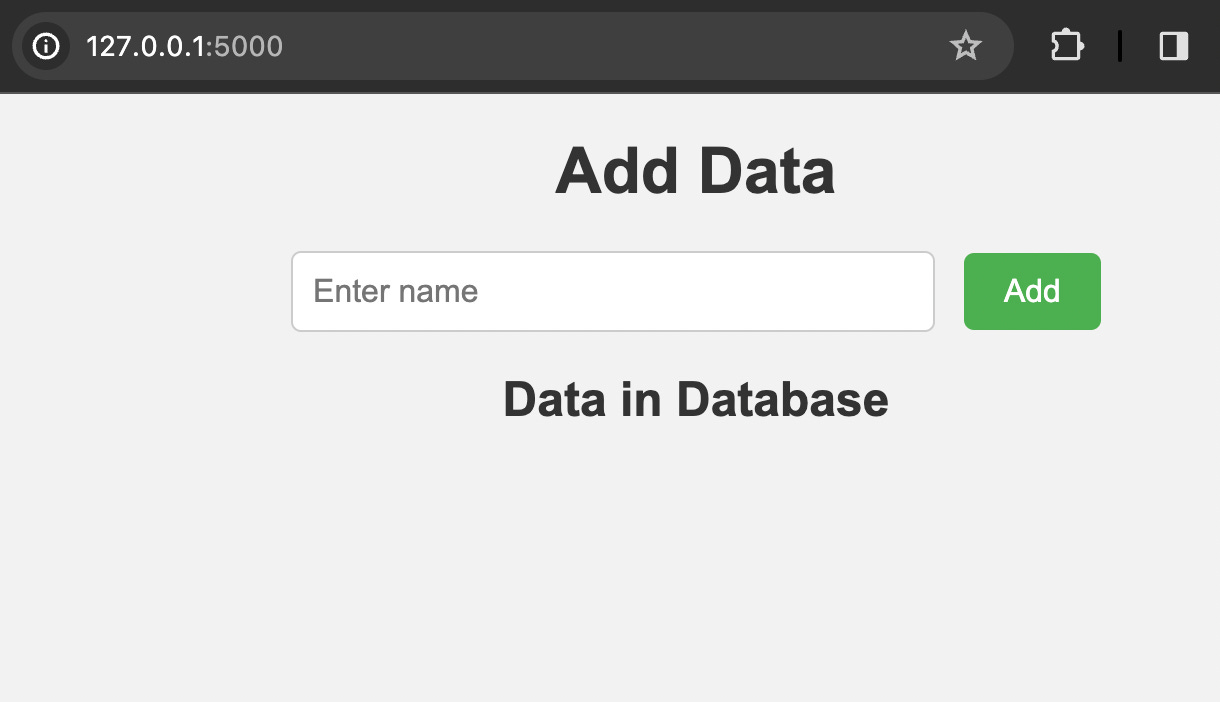
Try adding some data to the database by filling out the form.
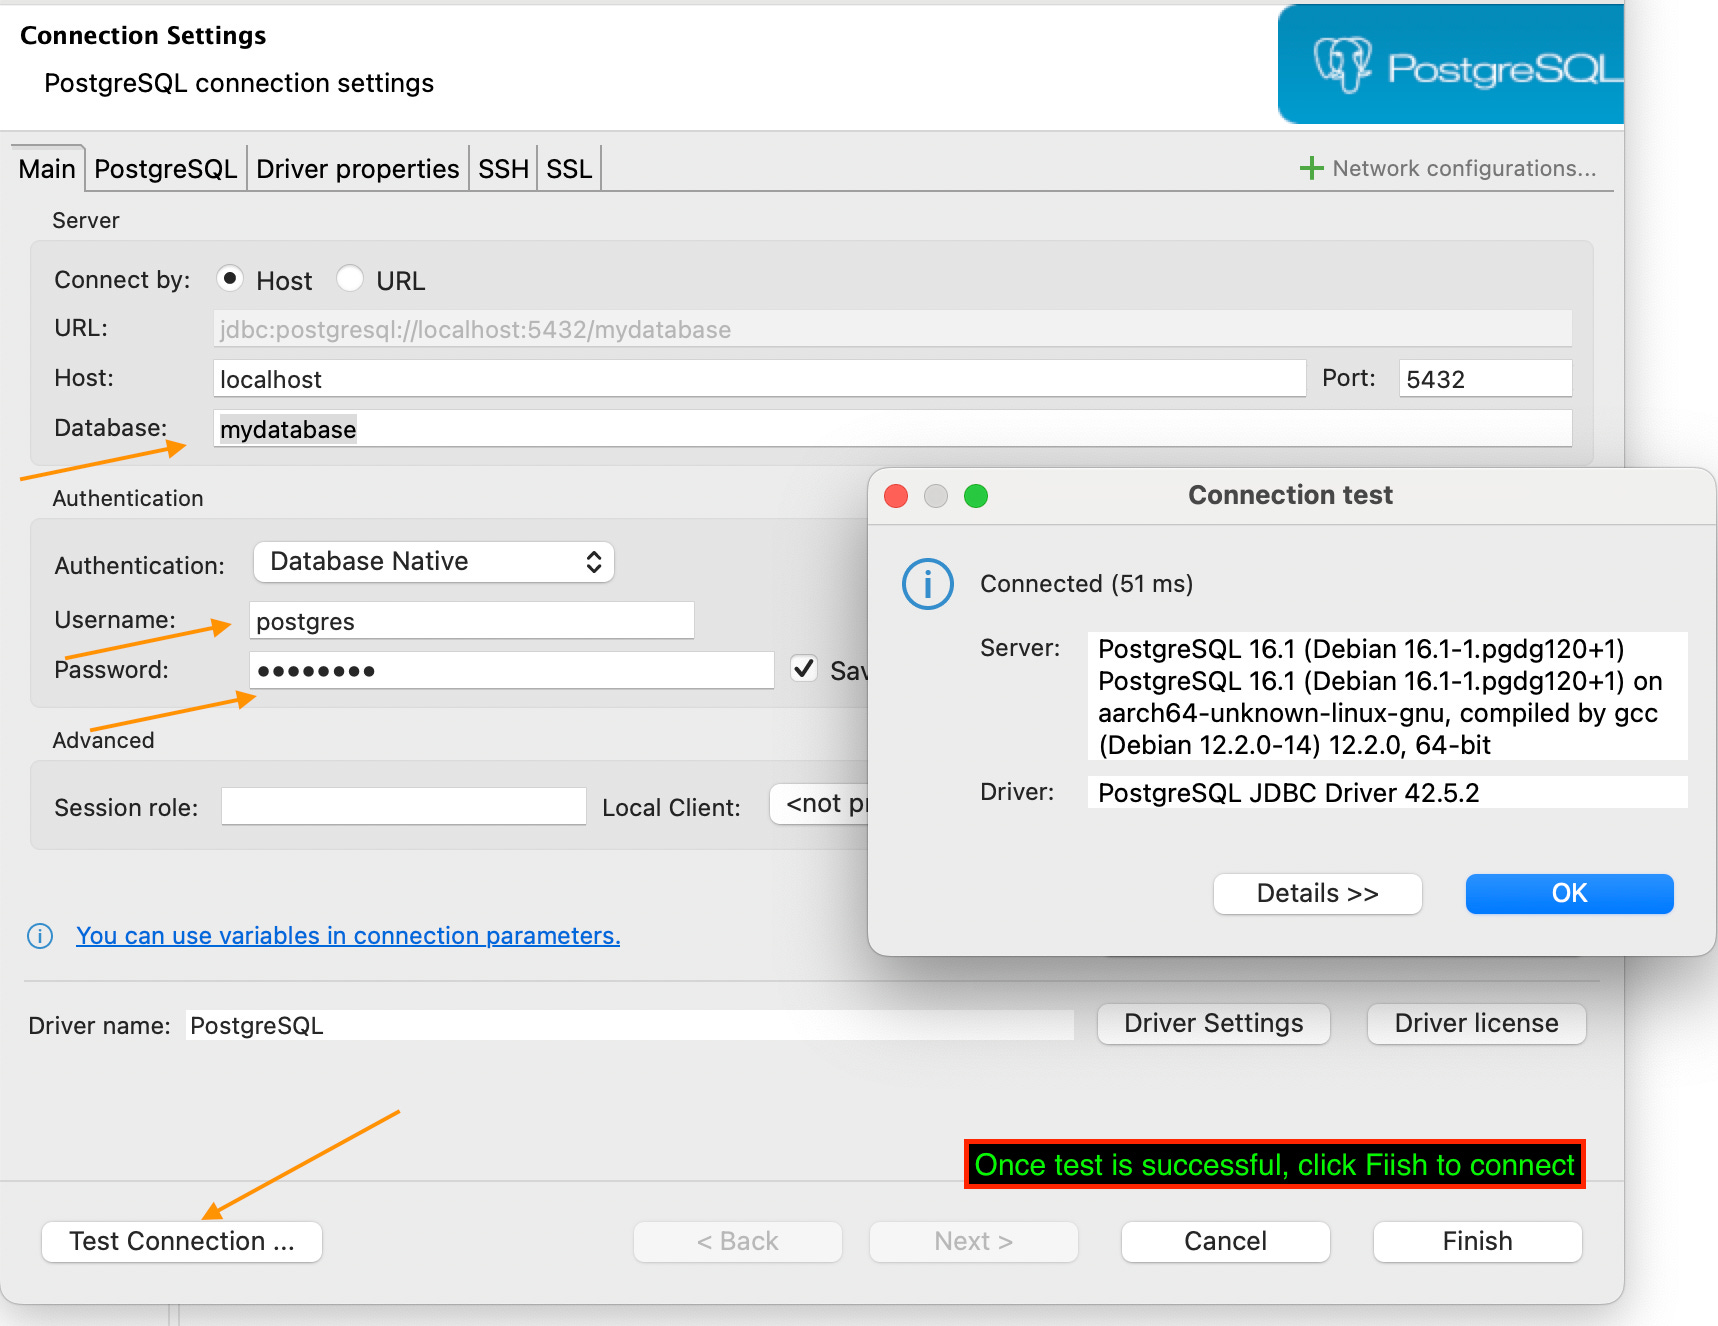
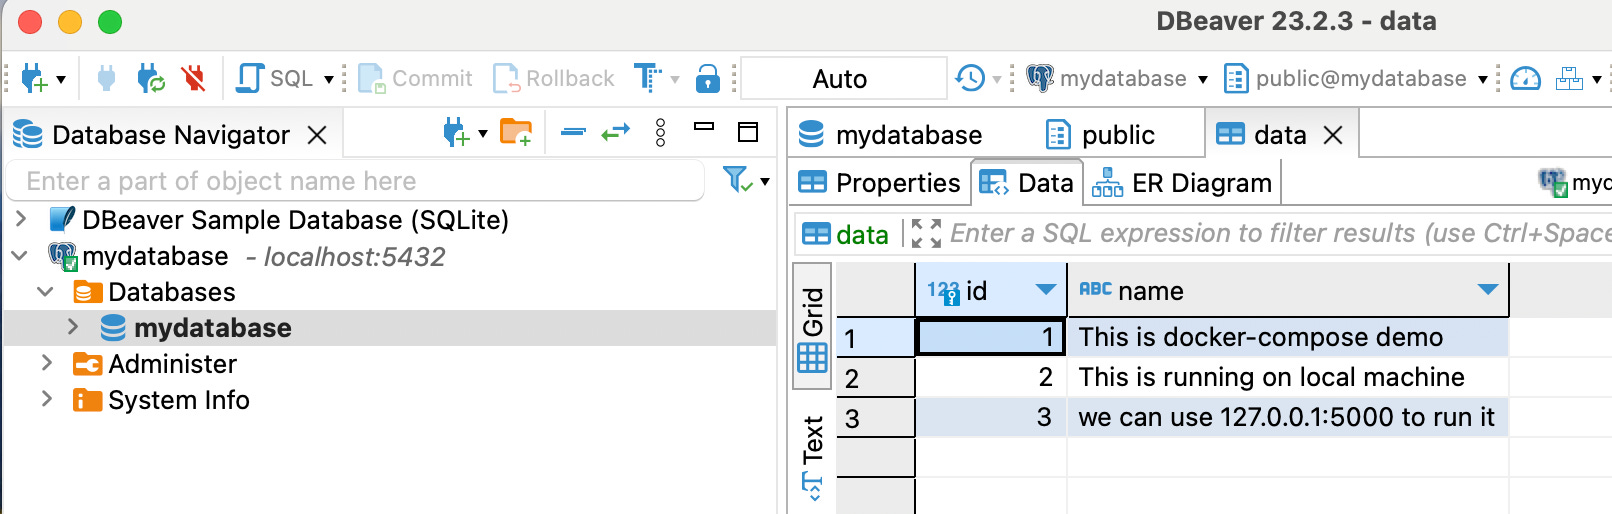
Now you have a working application with web and db container. You can connect to this Postgres DB from pgadmin or the dbviewer application.
You can stop/start the application with just one simple command. Since you are using docker volume, your data will persist during the application restart.
docker-compose down
docker-compose up
Using environment variables
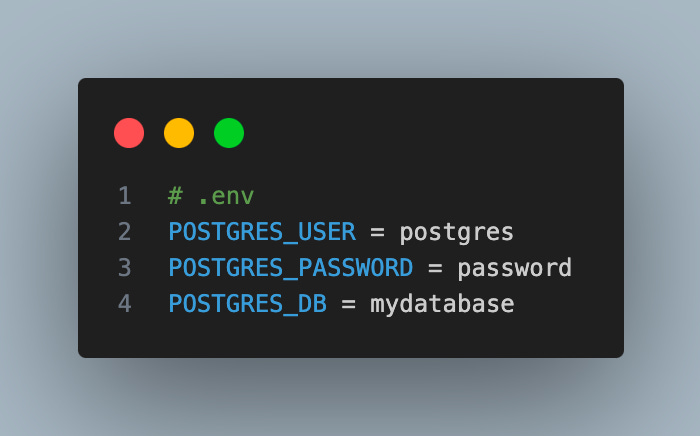
As I said earlier, we should not hardcode the credentials in the config file, instead we can use the .env file to pass the DB credentials.
Create a .env file in the same location as your docker-compose.yml file. Remove the environment variables from the docker-compose.yml file and add them to the .env
Now you run the command docker-compose up and you have your application up and running.
But, one problem with this is that if you store your application code in Github, your creds will be exposed. There should be a way of keeping the credentials separate from our code (Locally, where we are running docker-compose.
I will create a db-variables.env to store the db creds and pass this while running docker-compose
docker compose --env-file db-variables.env upThat is all for this blog. See you at the next one.
If you enjoyed the writing leave your claps 👏 to recommend this article so that others can see it.
Connect with me on LinkedIn: https://www.linkedin.com/in/akhilesh-mishra-0ab886124/
Read suggestions:
Continuously Build & Deploy Python Web App On AWS With GitHub Action.